August 9th, 2008 admin

Tippmann has an online X7 configurator where you can see what your marker will look like with different accessories added. This is a great way to choose the look of your new Tippmann X7 with Egrip before you buy it. You can mix and match parts, and it will even tell you what the MSRP is. Keep in mind that most online retailers will charge less than MSRP so you should save some money.
You can use the online configurator to built an X7 parts list, and then vist your favorite online paintball store to order the parts. I like the eGrip with Folding X36 Stock, X7 Flatline Barrel for improved accuracy and distance, M-16 Style Carry Handle, M-16 Short Mag, and X7 Double Trigger Kit.
Give the configurator a try and let us know what your perfect marker looks like.
Posted in Customizing, X7 Mods, X7 Upgrades | 2 Comments »
July 8th, 2008 admin
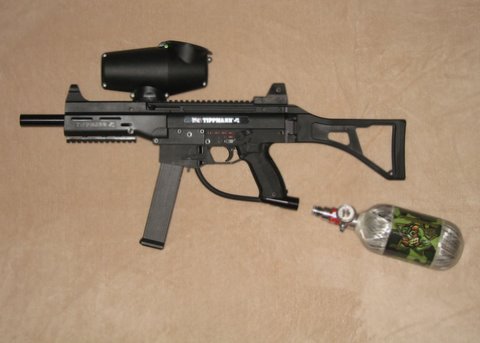
This post is the beginning of a series on how to upgrade your X7 to one of thousands of different looks. The X7 truly is one of the most upgradeable markers available today. The X7 UMP is an easy and very sharp looking mod which looks very close to the real thing.
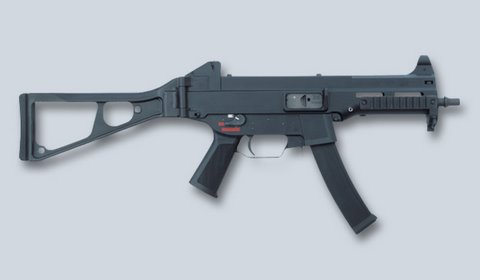
Here is what a real Heckler & Koch UMP looks like:
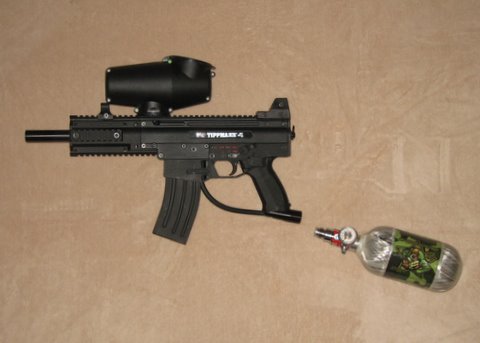
And here is what the modified Tippmann X7 UMP looks like:

How To Upgrade
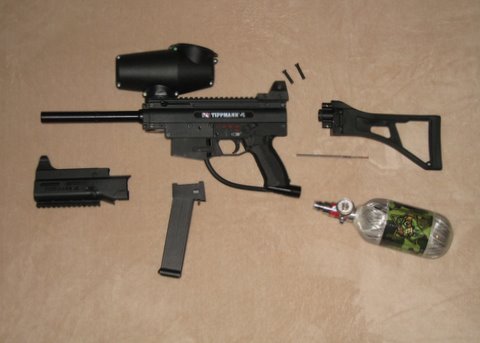
Step 1: Begin with a standard X7 marker. This mod will work with any version of the X7; Basic, Response Trigger, and eGrip. In our example, we are using an X7 eGrip Marker.
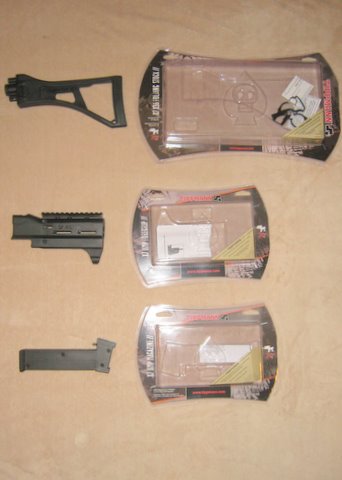
Step 2: IMPORTANT – Make sure that you have removed your CO2 or HPA tank from your marker before beginning any work. The X7 UMP upgrade will require three parts and should only require a pair of pliers to remove the associated push pins. The three parts are the UMP Style Shroud (Tippmann Part #: T275045), UMP Style Magazine (Tippmann Part #: T275043) and the X36 Style Folding Stock (Tippmann Part #: T275044).
Step 3: Remove the End Cap from the rear of the marker. To do so, use a pair of pliers to remove the two push pins which hold the cap in place. The push pins are different lengths, so mark them accordingly. The shorter push pin is the top pin. Be careful when removing the End Cap as the Guide Pin and Drive Spring will come out. Note the position of these parts so that they can be reinstalled. Below is an image of the End Cap removed.
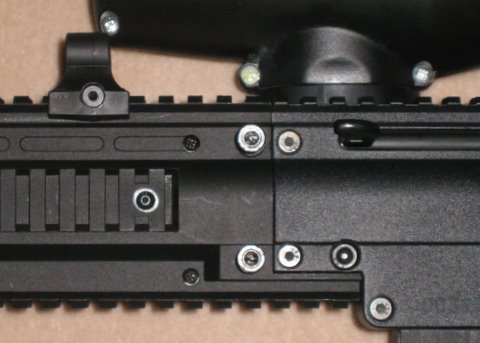
Step 4: Remove the Front Grip from the marker in a similar way. There are two push pins which hold the Front Grip in place. You will want to store this away in case you wish to revert back at a later time. The image below shows the location of the push pins which hold the Front Grip in place.
Step 5: Remove the magazine from the marker. There is a release button on the side which should allow the magazine to slide out easily. The only downside to the UMP Mod is that the new magazine does not double as tool storage as the standard magazine does. This may mean keeping the tools in your pocket if you need them on the field during play.
Step 6: Now we are ready to begin installing the new parts. In the same order that we just removed items, we will add back the upgraded parts. The X36 Folding Stock should slide in where the End Cap was removed. Be sure to replace the Drive Spring and Guide Pin in the same direction it was when removed. This means that the drive pin should be toward the rear of the marker. Replace the two push pins (shortest on top) to secure the stock in place.
Step 7: Slide the new UMP Shroud over the barrel of the marker until the Push Pin holes line up. Insert the push pins to secure the new shroud in place.
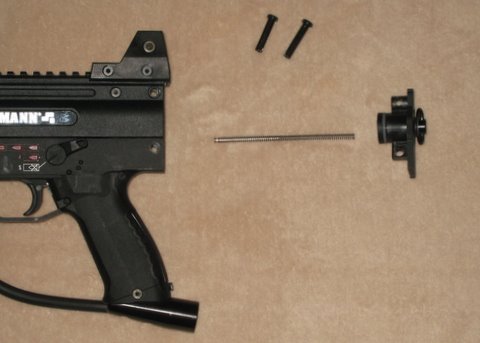
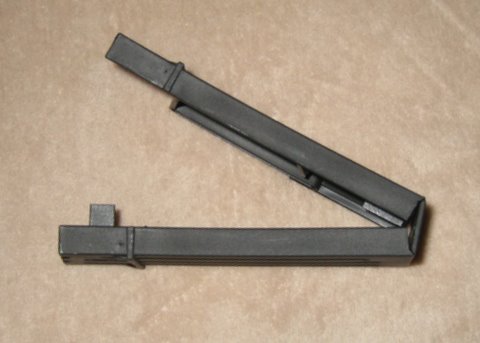
Step 8: Slide the new magazine where the stock magazine was removed. Be sure to push hard enough for the lock to engage. Below is a picture of the parts prior to installation.
Step 9: Take your marker out to the field and be the envy of your friends.
Posted in X7 Mods | No Comments »
